Grow Number 8

June 21, 2014 - October 25, 2014

Strain:
Bubba Kush (Indica)

Terminology

NOTEAll activity for each grow will now be tracked and recorded in the opening table. Occasionally an item is linked indicating additional text or pictures. The first six grow logs contained a considerable but necessary amount of anecdotal material but now that the grows are using a standardized procedure to produce a perpetual harvest (see below) only the basic vital statistics and stage of growth pictures need to be updated.

DATE
HEIGHT
ACTIVITY and Feeding Log
 DAY
Notes
6-21
3.5"
Started 2 BK clones in 1 gallon pots
1
Vegetation
6-28
4.0"
Begin BioThrive Grow
8
Vegetation
7-5
4.5"

15
Vegetation
7-12
5" -  6"
Topped both plants and began LST
22
Vegetation
7-19
4.0"
Recovery
29
Vegetation
7-26
4" - 5"
Second topping as needed
36
Vegetation
8-2

Recovery
43
Vegetation
8-9


50
Vegetation
8-16


57
Vegetation
8-23


63
Vegetation
8-28
7.0"
Flipped lights. Began BioThrive Bloom
1
Transition
9-6

Transplanted to 2 gallon pots
10
1st Flower
9-13


17

9-20


24

9-27

Day 30
31
Trichomes
10-4


38

10-11

All organic - no flushing needed
45

10-18

Early
52
Trichomes
10-25

Harvest
59
Trichomes
10-30

Hang dry until 25% of wet weight,  trim, cure in
glass jars with Boveda 62% humidity packs for 30 days minimum.


Perpetual Harvest:  Namaste Indoor Gardens consists of two separate growing areas: (1) the original area now dedicated exclusively to germination and vegetation under 112 watts vertical CFL with a supplemental 200 watt overhead CFL and (2) a  24" x 24" x 72" closet specifically repurposed for flowering under 250 watts HPS (high pressure sodium).

The vegetation area has two shelves. Two new plants are introduced every 30 days and placed on the lower shelf bumping any existing plants to the top shelf. After these new plants grow a total of 7 - 9 nodes and are around 6-8 inches tall they are topped to increase bushiness and begin low stress training (LST) . After a total of 30 or 60 days of vegetation and training they are moved to the closet where the lights are on a timer set for 12 hours on/12 hours off every 24 hours. This change in the photo period is what triggers the flowering cycle. After 60 days of flowering the two plants are ready for harvest.

This insures a harvest of two mature plants with a yield of at least an ounce and possibly more every 30 days. The California medical marijuana license allows for 6 mature (flowering) plants and 8 ounces of dried flowers.
This is considered an adequate amount for most patients.

June 21st: Week 1 (Vegetation)

Picked up two more Bubba Kush clones and placed them on the bottom shelf of the vegetation chamber awaiting transplant to 1 gallon nursery pots. Plant #3 was originally cloned 5/24 and #4 was cloned 5/28. They will be vegetated for a full 60 days in contrast to the previous grow (number 7) which was for only 30 days. This will be a good side by side comparison of extended vegetation.

6-24:


Transplanted the new clones into 1 gallon pots today filled with 2/3 FoxFarm's Ocean Forest potting soil mixed with 1/6 medium perlite and 1/6 worm casts. Each container given 1/2 cup RO H2O and the pots were equalized at 1150 grams which should hold them for the next 5-7 days. Unlike the previous pots these were not lined at the bottom with window screening - it is not needed to hold back the soil and removing it to transplant to larger containers damages the embedded root tips setting the plants back.


June 28th: Week 2 (Vegetation)

Nothing to report.


July 5th: Week 3 (Vegetation)

Nothing to report.


July 12th: Week 4 (Vegetation)


These plants appear to be a week behind the previous BK clones and #4 was already 4 days younger than #3.  Not quite ready yet to concede the need for top lighting so will wait for another week to see if they catch up.

Admittedly there is somewhat less light available on the lower shelf and the previous plants spent only 2 weeks there before being transferred to the top shelf. These two were transferred today after three weeks on the lower shelf. Plant #4 is 5" tall and has five nodes - plant #3 is 6" tall and has 6 nodes. Both plants topped.

7-17:  Plants began LST (low stress training) today.


July 19th: Week 5 (Vegetation)

Nothing to report.


July 26th: Week 6 (Vegetation)

Nothing to report.


August 2nd: Week 7 (Vegetation)

Topped several terminals that were growing above the future canopy so that the plants now are more open with a cup shape.


August 9th: Week 8 (Vegetation)

Nothing to report.


August 16th: Week 9 (Vegetation)

Began running the 200 watt overhead CFL at night and turned off the 112 watts of sidelight T5HO in order to save electricity and encourage the two sets of plants below to stretch as their vertical growth is needed to produce additional branching. Previous grows were  topped at 6 - 8 nodes (branches) which limited their vertical growth and the number of potential large colas.


August 23rd: Week 10  (Vegetation)


I don't expect much more vertical growth as the second topping and LST removed the central leader leaving a cup shaped canopy but I could be surprised during the flowering period.


August 28th: Week 1  (Transition)

Both plants transferred to the flowering chamber to begin the transition period with first flowers expected to show in about two weeks. Currently they are at 12" below the overhead light due to the increased heat. I noticed that Grow #7 flowered successfully at that distance under the 150 watt HPS so there should be no problem with the larger 250 watt bulb.


September 6th: Week 2  (First Flower)


These two plants (front left and rear right)) were transplanted to the larger #2 nursery pots as their root systems already completely fill out the #1 pots. The new soil was fairly moist within the bag and so only added 1/2 water.

There is the possibility that the transplant may delay the onset of flowering somewhat but the advantages of a larger root zone will more than make up for that.

I am more convinced then ever that topping the central leader should be used sparingly as it effectively stops all vertical growth and the creation of additional nodes on the central leader. It is a procedure that should be done only at that point in the 'stretch' where it is desired that all vertical growth cease. Topping the secondary branches is also problematic because it creates an irregular bushiness resulting in multiple tertiary shoots with smaller flowers off that secondary branch.

The best technique is LST - low stress training. By pulling the secondaries down and outwards after they have stretched and put on several nodes themselves is the best procedure for multiple bud development allowing up to 3 - 4 equally developed flowers per secondary branch. Unlike topping,  growth does not slow down following the procedure. The hanging of the training fence ties and the constant flexing caused by the fans is a form of resistance training which strengthens the branch so that it can produce and maintain larger flowers.

Another technique is super cropping in which the too tall central leader is pinched until the internal tissue is damaged and the leader falls over to a horizontal position - the plant will repair itself by strengthening and reinforcing the damaged section or knuckle. This will also reverse the tips position from vertical to horizontal growth keeping it at the same height.

Recently I was reading an overview of cannabis cultivation and learned that: "There is an ongoing debate over the importance of the "dark period". It has been shown that, when subjected to a regimen of constant light without a dark period, most types of flora, including cannabis, will begin to show signs of decreased photosynthetic response, lack of vigor, and an overall decrease in vascular development."  I had suspected this and the next grow will include 6 hours of darkness (18/6) during the vegetative cycle with the lights going off at midnight. This will also save 25% of the electricity costs as well.

9-10:


Made two improvements today - installed weather-stripping seals around the door frame to block any outside light from entering the chamber during the dark period and attached a 4"x10" metal hood to the exhaust vent .

The back left corner where the hood is mounted was consistently 4 degrees hotter than the rest of the chamber but now all temps are equalized. The new door seals also allow the exhaust fan and its carbon filter to work more efficiently in removing the odors when the door is shut.


September 13th: Week 3  (Flowering)


Both plants are fully flowered with over 47 bud sites between them. Many of the sites are somewhat obscured by adjacent foliage but will emerge more prominently in the coming weeks. They were placed on inverted #2 nursery pots bringing them to within 10" of the overhead lights.

9-15: Tightening up the watering schedule as I think the plants benefit, once the roots are fully established, from more frequent but lighter waterings. I have all plants now in 2 gallon pots receiving 1-1.5 cups water and nutrients every 3rd day topping off at 2600 grams.

I also added and scratched in 1 tablespoon Mykos (mycorrhizal root inoculant) per container. I had meant to do that when transplanting the plants to larger containers because the product works best when applied directly to the growing root tips.


September 20th: Week 4 (Flowering)


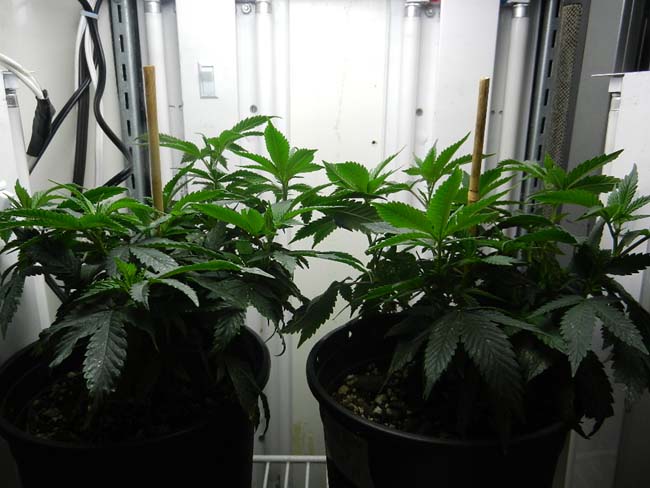
Bubba Kush flowers at 23 days. Many new pistils in just the last couple of days as the flowers start to build and stack their calyxes (ovaries) - there are two pistils per calyx which are the external pollen receptors.  

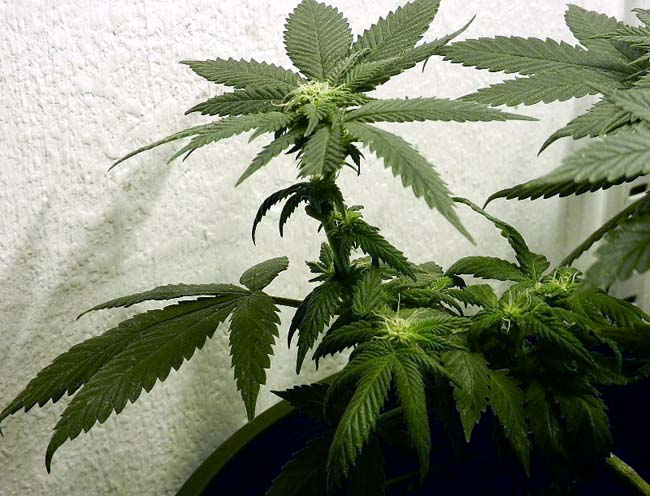
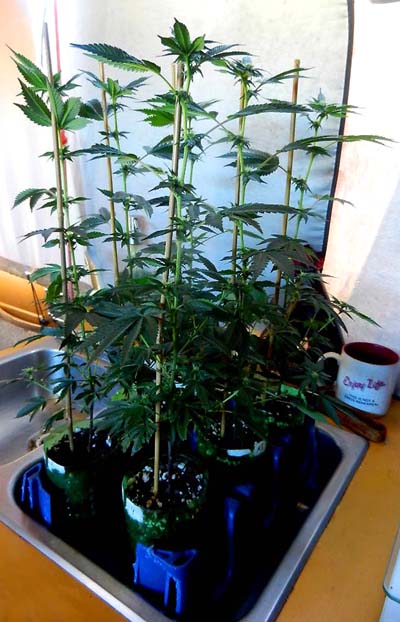
In this image you can see the results of training a branch to grow horizontally for a period of time so the buds further down are given a chance at equal development. Here there are 3 flowers on the horizontal and 3 more on the vertical stalk of the same branch. A number of the larger fan leaves have been removed in order to highlight the structure of the branch which begins horizontally at the lower right hand corner and terminates in a vertical position. 

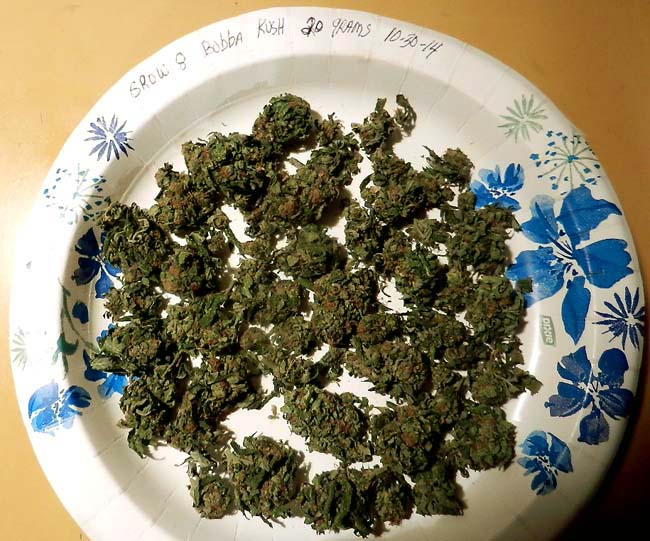
Already giving some thought to this season's harvest. Read about one grower who just leaves his plants in their containers unwatered in a dark but ventilated room where they dry 'on the stalk' so to speak. Thinking I might divide the various harvests in two sections - one plant left in its pot and the other cut down and hung. Both sets can be dried in the flowering chamber which has adequate ventilation and filtered exhaust and won't be used again until next year.

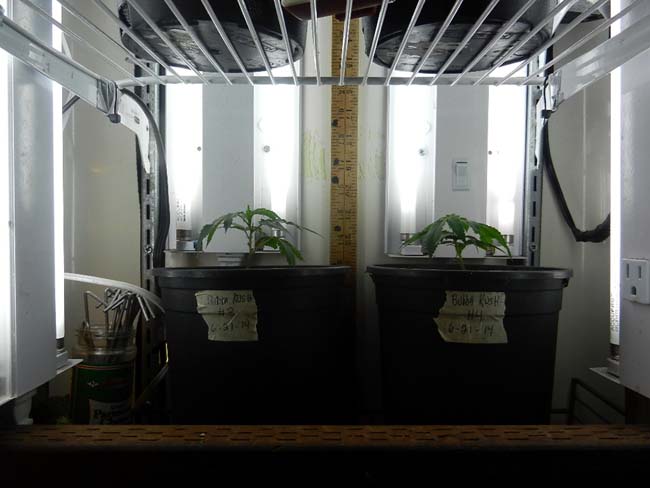
9-25: Relocated the large Holy Grail Kush plant back to the (modified) vegetation chamber to give all the plants more room and light.


September 27th: Week 5 (Flowering)


Raised the shelf in this chamber bringing all its plants to within 5 inches of the overhead light which is the recommended minimum distance.

The amount of light intensity is 50,420 foot candles or 27,500 lumens. If you make comparisons on the chart you will see that 50,000 foot candles is just 15,000 fewer than any of the larger wattage HPS bulbs at their recommended distance. Basically this is as good as it gets given the space and heat considerations.

With an eye on the increasing electrical costs I have been experimenting with leaving the exhaust fan off until the outside temperatures warm up around noon. This cuts its energy drain in half without raising the chamber temps beyond the low 80's. Currently the plant odor is not yet noticeable and so it is safe to leave it off. In another couple of weeks that may not be the case. Also relocated its collector hood to the back side of the overhead light increasing its extraction efficiency.
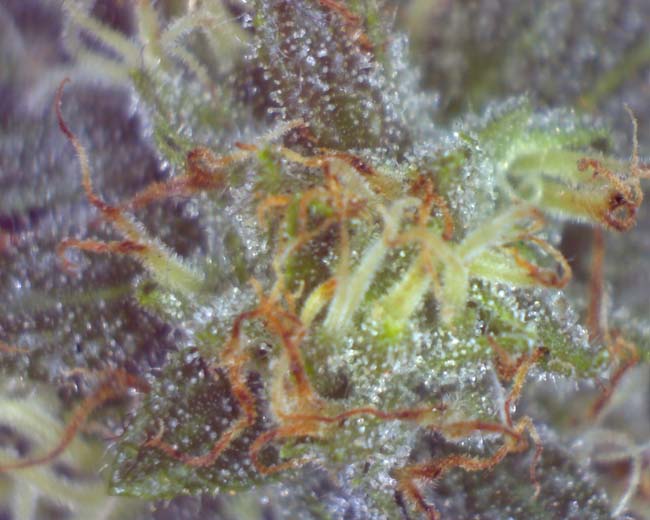
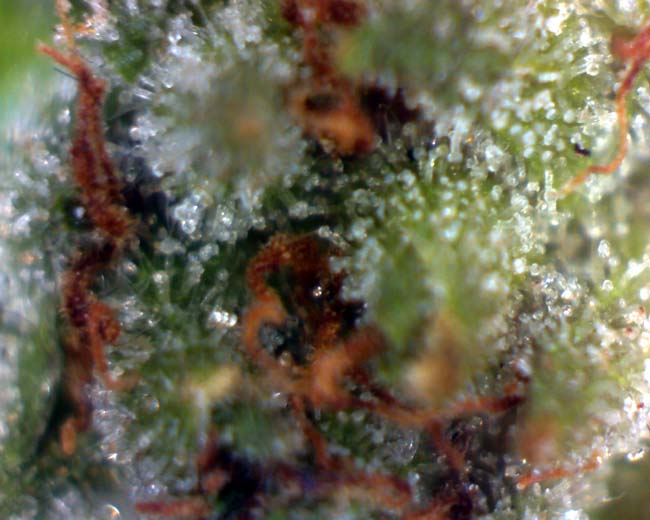
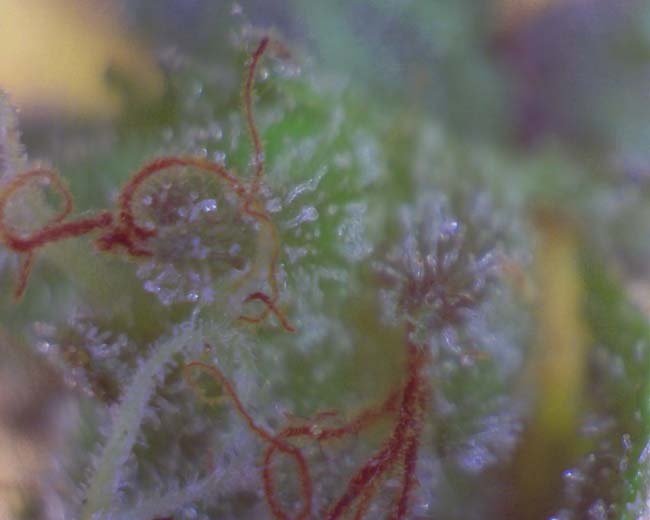
9-29:


Here is an image of the developing calyxes and pistils - notice that about 50% of the pistils have begun to mature and darken which is a sign of their approaching maturity. The trichomes are still quite immature though and appear as a light dusting on the flowers and leaves.
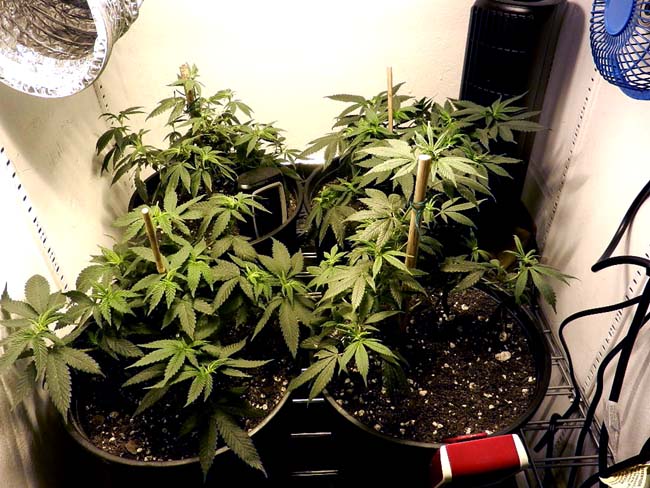
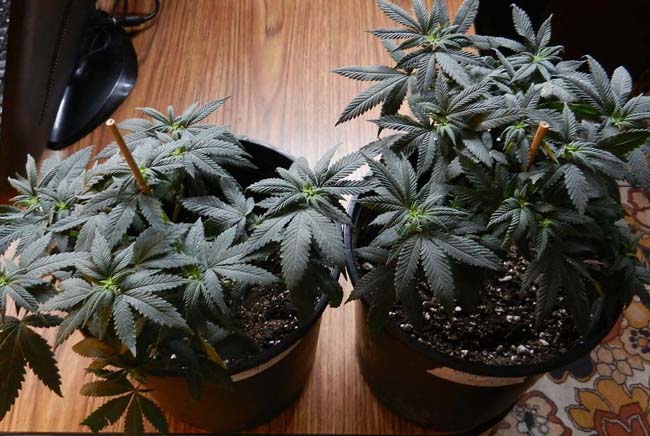
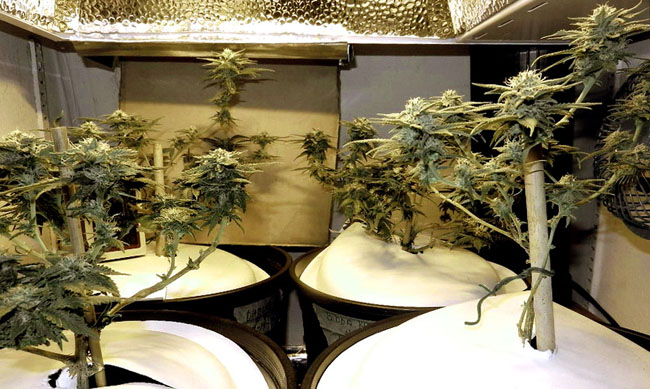
9-30:


 Bubba Kush: foreground left and rear right

Found this article on the advisability of removing most of the fan leaf after the 4th week of flowering on Kush strains. The claim is that the plant no longer needs them and they would have dropped off in nature by that time. Retaining them only drains nutrients better directed towards building flowers than leaf at that stage. The plant's nutrient needs can be met by the fully developed root system unlike a plant still in the vegetative stage.
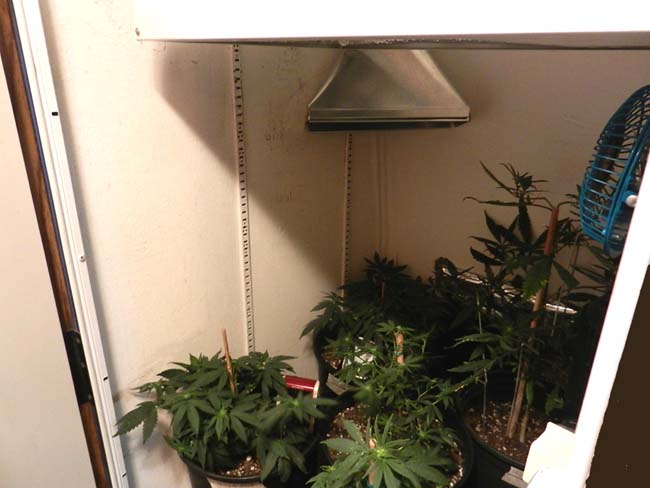
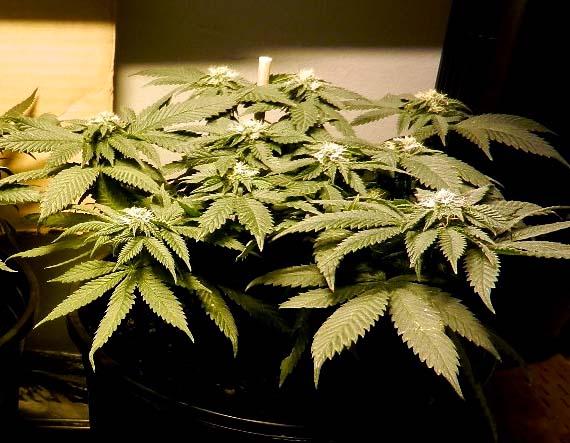
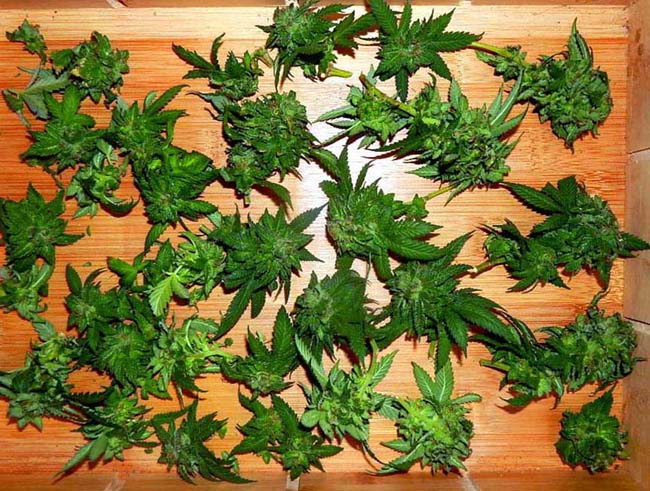
Accordingly all the current plants, being Kushes, were "stripped to sticks with just a few fan leaves, but with all of the budding sites intact" as the article suggests. Added inverted paper plates as container covers to help retain soil moisture and reflect light up to underside of plants.


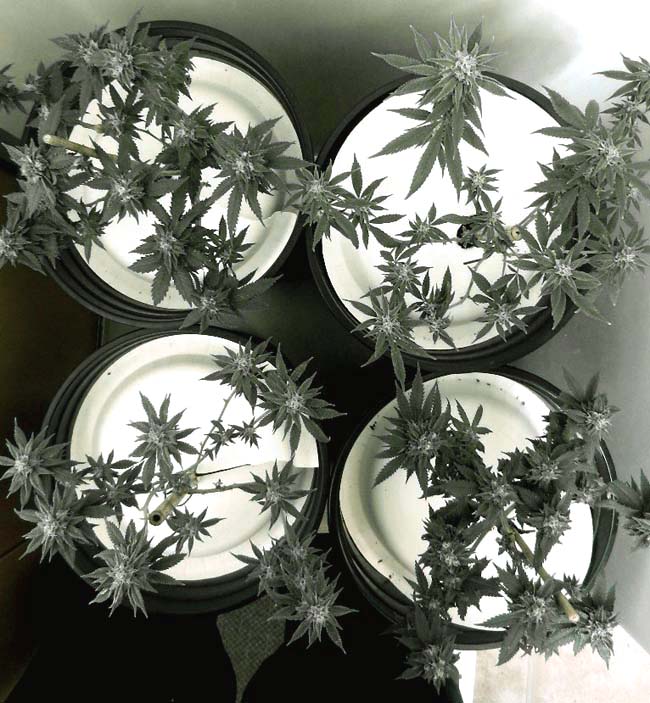
Here is a enhanced (Photoshop) image emphasizing the more exposed floral clusters resulting from the recent defoliation as seen from the overhead light.


October 4th: Week 6 (Flowering)

Currently in the middle of a heat wave with outside temperatures in the 80's to 90's through the weekend. Shifted all plants to the vegetation chamber and installed the A/C in the flowering chamber using the exhaust fan to vent the extra heat. Since the two chambers are on opposite sides of a  common hallway the doors between them are left open during the day making, in effect, one contiguous chamber.


10:00 am: Inside grow room temps over 86 already  and the A/C can no longer could keep up. All plants moved to the front of the coach under the surround windows and overhead fan which is just as acceptable and quite a bit more energy efficient.

With another fan and the outside door open plus a little cross ventilation the temps are 84F. This is their first exposure to direct sunlight ... will have to get a good light meter to see if the lumination equals that of the grow chambers.

Certainly there is enough light to carry the plants through the next couple of days.


October 11th: Week 7 (Flowering)


I was wondering why the flowering chamber heated up so fast even though the exhaust fan is 190 CFM (cubic feet per minute). Since the entire chamber is only 24 cubic feet the air supply should be refreshed at least 7 times per minute.

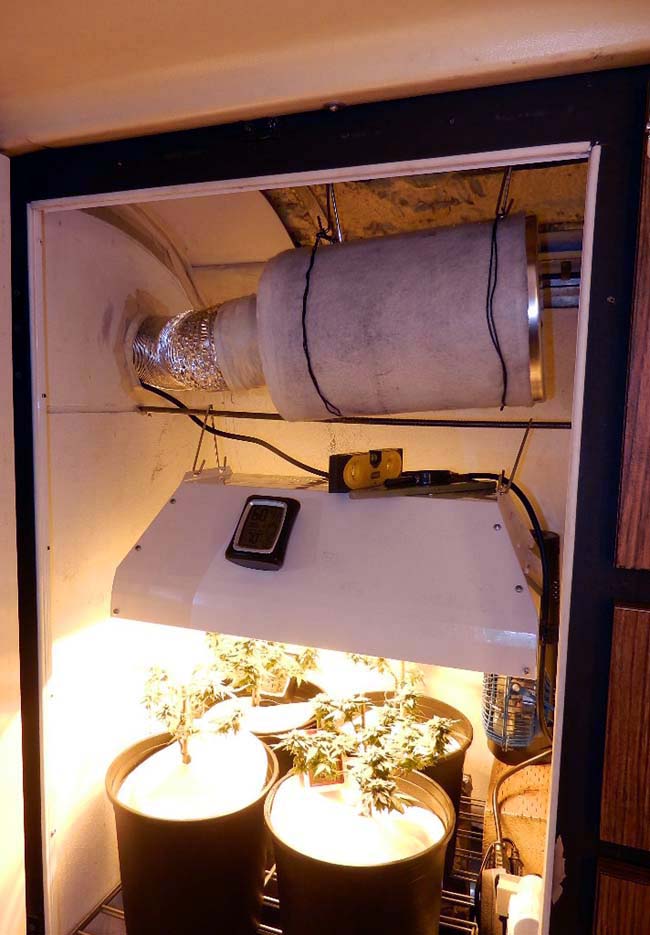
Reread the instructions and realized the carbon filter had been installed incorrectly. The filter is supposed to be in the chamber with the exhaust fan mounted downstream pulling air through it and venting outside the chamber. I had mounted both externally with the fan pushing the extracted air through the filter instead. The extra load on the fan reduced its efficiency and resulted in the heat build up.

Relocated the filter to the top of the flowering chamber in line with the vent opening suspended by bailing wire from the ceiling.  Before the next grow I will attach a vent tube to the outlet side of the external exhaust fan and route all the extracted heat out through the roof so that  will be removed from both the chamber and the coach. For the time being it vents near the ceiling in the rear bedroom and is removed by that room's 14" overhead fan.


October 18th: Week 8 (Flowering)


This image was produced yesterday using an inexpensive ($$) hand held microscope. It shows mature trichomes already 50% filled with cloudy resin but still two weeks away from harvest.


Added a 4" inline inlet fan to the flowering chamber to bring in cooler outside air using a cut down gym sock over the inlet side duct to filter out insects, dust and light.  

This unit was inexpensive and doesn't produce a lot of air movement ...40 CFM with a maxim boost of 80 CFM using an optional temperature activated switch which was also ordered but hasn't arrived yet.

The fan can be replaced by a more powerful fan if need be. 


October 25th: Week 9 Harvest


Here are the trichomes at Day 57 ... all fully formed and opaque due to increasing amounts of resin. Few of the trichomes have started turning amber yet indicating they have not passed peak maturity. All of the flowers feel very chunky - compact and dense with resin giving off a noticeable odor when brushed against.


While making the trichome image I noticed that several of the buds that had been trimmed fairly closely on 9-30 were now showing signs of desiccated and discolored outer leaves ... hopefully resembling a normal process called purpling. After trimming away that material the interior of the bud looked normal with no signs of rot or mold.

But, just in case it might be something else, all similar flowers were removed and will be dried in a separate paper bag. The removed material weighed a total of 19 grams. Pictured above are a few of those flowers with the one on the upper right weighing 2 grams by itself. These are by far the heaviest buds I've grown for their size.


Went ahead and harvested the rest for another 60 grams making the total 79 grams wet. When dried and cured the total yield of the two plants will be around 1/2 of an ounce which is average for the past micro grows. Since the current humidity is 60% these flowers will be dried using the paper bag method over the next 7-10 days. After that they will be jarred with Boveda humidity packs.

It should be noted that these two plants exceeded their sister grow (#7) by 57 grams wet weight. Several variables account for the difference (more light, later harvest by 10 days) but primarily this grow was vegetated a total of 70 days versus 28.

10-27: Inserted Boveda humidity packs into the paper bags to slow the drying process down. Today (late afternoon) the wet weight has gone from the original 79 grams to 39 grams -  a drop of 51%. The first three days always shows the most water weight loss. Ideally they will finish around 25% in another 4 to 7 days. The longer the initial drying period the more chlorophyll will be removed before the flowers receive their final trimming and a 30 day curing process is begun in glass jars.

10-28: Now down to 29 grams or 36% of the original wet weight. Not much additional trimming will be needed as much of the sugar leaf has shrunk and wrapped around the buds.

10-29: Down to 25 grams or 31% of the original wet weight. Now that the outer leaves are shrinking more of the underlying bud is exposed and the color imparted by the darkened pistils is beginning to show through. All stems, except for the thinnest, are still pliable and do not snap. Just sampled some of the sugar leaf and found it to be very smooth with little or no chlorophyll taste remaining. Another day of drying and we should be at 25%. Rain is expected Friday so the humidity level will be quite high which should slow the drying as well.

October 30th:  Curing


Reached 22 grams or 28% early this morning. The remaining sugar leaf was dry and crumbly and all except the largest stems snapped easily. The buds were trimmed for a net harvest of 20 grams which were transferred to a small mason jar for their final curing.


Notes for Grow 12: Post Mortem (Smaller containers)


Examined the root balls and noticed that they just barely filled out the upper half of the container - good development but hardly requiring the space of a 2 gallon pot.

Next grow I will initially vegetate 6 clones in 20 ounce soda bottles and possibly transfer them to one gallon containers.

The closer spacing will force the plants to grow vertically until they are  8 - 10 inches tall.

At that time the photo period will be shortened and they will enter the flowering stage where they will grow another 50% or so reaching the 15 inch maximum height the flowering chamber can handle.

The plants will not be topped or otherwise trained as that would encourage side branching detracting from the central colas' development.

This technique was used with good success in Grow #4 where the containers were housed in a 12x14" plastic soda bottle carrier making it easier to transport the 6 plants to the sink for watering.

Since then wooden handles have been added to both ends. Coincidentally that size exactly equals the footprint of the HPS light hood which makes for a perfect fit and guarantees the maximum amount of light exposure. The height of the plants also fits within the vertical penetration range of the 250 watt lamp which begins at 5" and extends downward for another 11 inches before becoming too weak to be useable.


Back to Top  

Copyright © 2013/2014 by Boyd Grant.  All Rights Reserved