June 14th: Week 1 (Vegetation)
Last Monday
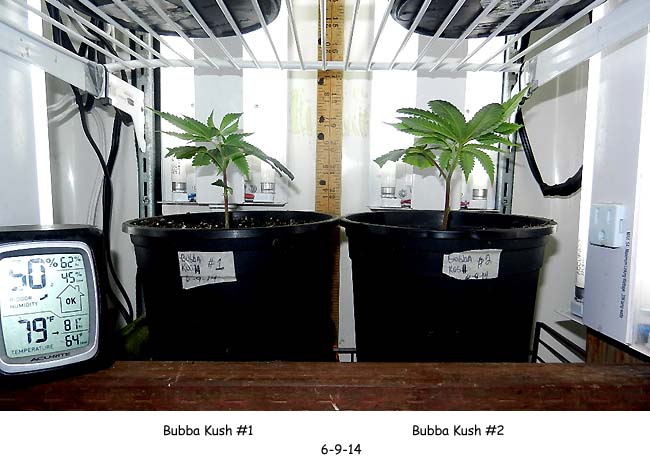
I picked up 2 Bubba Kush clones from my former grower now doing business as
Kali Klones and transplanted them into 1 gallon nursery containers
containing FoxFarms organic potting soil with an additional 30% perlite added.
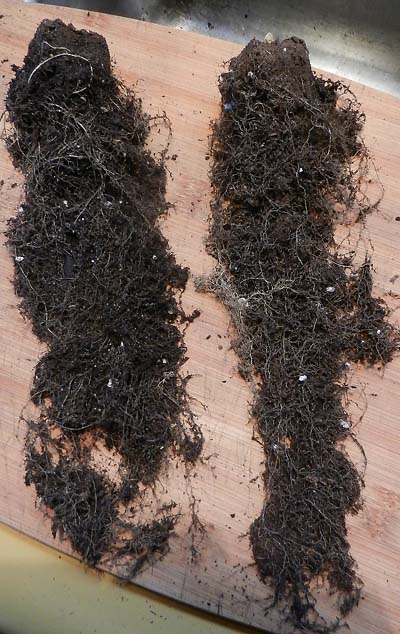
The clones were originally taken from the mother plant only 2 weeks previously (5-24-14) and are already well rooted.
They were placed on the lower shelf where they will do their initial
vegetation - this section of the growing area gets most of it's light from the lower
half of the 8 vertical 14 watt T5HO bulbs. That should be adequate for the early growth
as the young plants don't need a lot of light and can be overwhelmed by bigger bulbs.
My grower recently toured a major medical marijuana outdoor
grow in Northern California. He was advised that the key to a successful
harvest is what you do with the plants in the vegetative stage - building
roots and stems to support abundant flowers - confirming what I had already
begun to suspect. Much of the online grow log focus however
is on the flowering stage but, by then, if the plants have not received a
good foundation it's not going to make much of a difference.
He also recommended top dressing with blood meal as the primary fertilizer.
I will have to compare that with the BioThrive organic products I am currently
using to see if it offers an advantage. [
Later
- blood meal's advantage is that it is extremely high in nitrogen - two to
four times that of most fertilizers. It is a slow release product though
and useful in keeping deer away from outdoor grows. But it would be too 'hot'
for indoor grow vegetation . However I did discover a frequent companion
product - bone meal which is high in the natural phosphorus needed during
the flowering stage.]
The containers were moistened with 1/2 cup RO (reverse osmosis) H
2O
24 hours prior to transplanting and the root cubes had also been freshly
watered. Both planted containers were equalized at 1080 grams and should
be able to go for 3-5 days before needing to be watered again. With young
plants and immature root systems it is important not to over water and drown
the roots. That's why the plants will be weighed before and after watering
using 950 grams as the dry base weight that triggers rewatering.
6-15:
It has been 7 days since these plants (lower shelf) were last watered. Both
containers are at 960 grams but showing absolutely no signs of wilting! Previously
I would have panicked and probably watered them several times already. But
I will be keeping a close eye on them because at this early stage there is
not much margin for error.
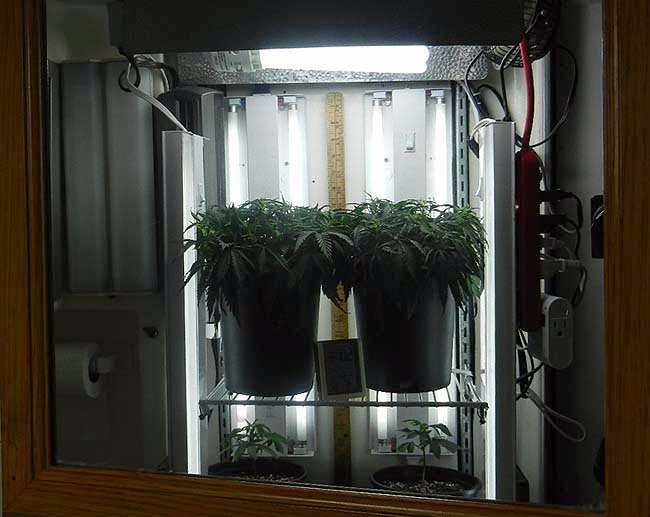
Sometimes when photographing a small enclosure like this RV bathroom you
can use a mirror to get distance and perspective. From this angle the small
size of the grow shelf (12" x 16") is apparent. In order to double crop the
height of both sets of plants must be constrained.
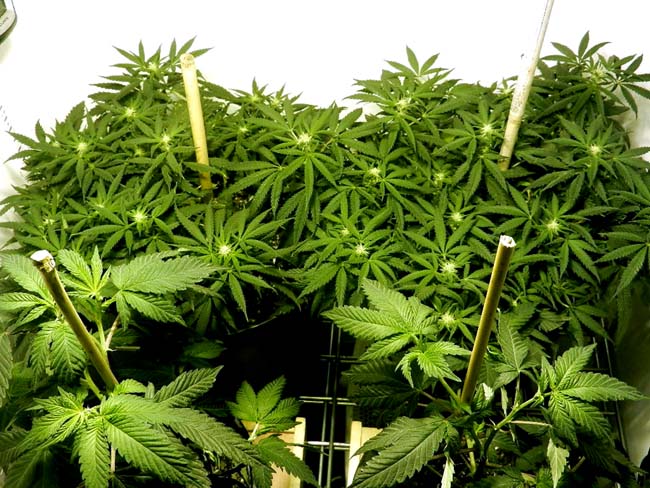
The older plants on the top shelf are being trained to grow over and down
the edge of the container. Keeping the growing tips below the rest of the
plant forces the secondary nodes (below the terminal) to start to grow
vertically as well. This keeps the canopy relatively flat topped like a well
trimmed hedge. A flat canopy allows all nodes/buds to receive equal light
during the flowering stage and thus all will develop equally in size.
6-16: Plants dropped below 920 grams this morning and were given 1/2 cup of RO H
2O
mixed with Super Thrive @ 2 teaspoons p/gal dilution (light feeding)
bringing the containers up to 1080 grams each. They each are over 4" tall and now have four nodes.
6-19: Plants @ 970 grams and have grown almost an inch in height since last watering. Given 1/2 cup of RO H
2O
mixed with Super Thrive @ 2 teaspoons p/gal dilution (light feeding)
bringing the containers up to 1085 grams each.
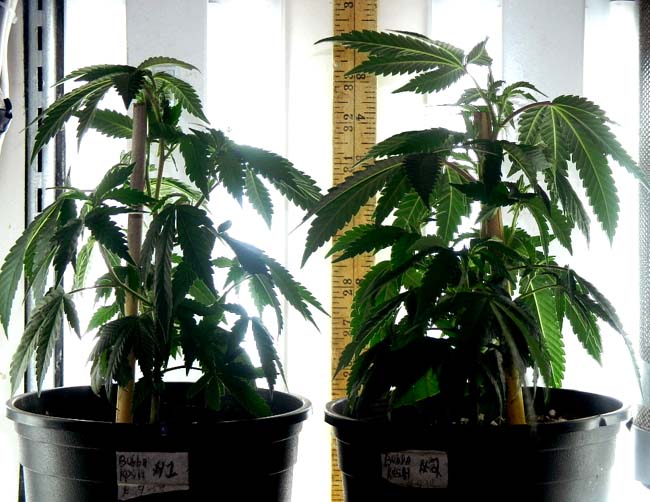
June 21st: Week 2 (Vegetation)
Plants have put on 2.5 inches in height over the past week and are growing
strongly. Both plants were moved to the top shelf where they will be vegetated
for the next thirty days - decided on a shorter vegetation for this grow with
only one topping as a comparison to the previous 60 day twice topped grow.
The overhead 200 watt bulb has been turned off saving enough in electricity
to power the additional grow room without any increase in monthly bills.
In a
previous grow six plants were grown to 16 inches
and flowered using only 112 watts (10,800 lumens) of CFL side lighting.
This week 2 more clones will be started for the next rotation with
the current two vegetating for 30 days and the new clones at 60 days insuring continuous
monthly harvests through October.
6-23: Both plants watered today bringing the container
weights up to 1100 grams from the low 900's. They took a little over 3/4
cup of RO H
2O
mixed with Super Thrive @ 4 teaspoons p/gal dilution (heavy feeding).
June 28th: Week 3 (Vegetation)
Topped (removed terminal node) each plant at the 6th node temporarily stopping
vertical growth at 7". The plants will now develop nodes 4 and 5 as new terminals
(tops) resulting in a bushier plant.
July 5th: Week 4 (Vegetation)
Plants have recovered nicely from being topped and the
side nodes/branches are beginning to develop and extend. Since these plants
are only going to be vegetated for 30 days they will not be topped a second
time nor will they be subject to the rigorous training of the previous grow.
The plants will be allowed to double in size during the stretch following
the light change and be given some light training to keep the canopy open.
Without a second topping though there will be fewer nodes but they should
produce larger flowers since all of the plants' resources will be concentrated
on them.
I used a simple light meter yesterday to determine that the effective penetration
of the 150 watt HPS bulb in the flowering chamber is over 12 inches deep
which encouraged me to grow these two out instead of restricting them to
a flat topped canopy as are the other two they will be sharing the chamber
with for 30 days starting next weekend.
Another chance to do a side by side comparison. I think I like the
sense of a well run scientific experiment that I get from keeping these logs.
Luther Burbank of the Cannabis World I'm not but maybe a little bit of Walter
Mitty ...
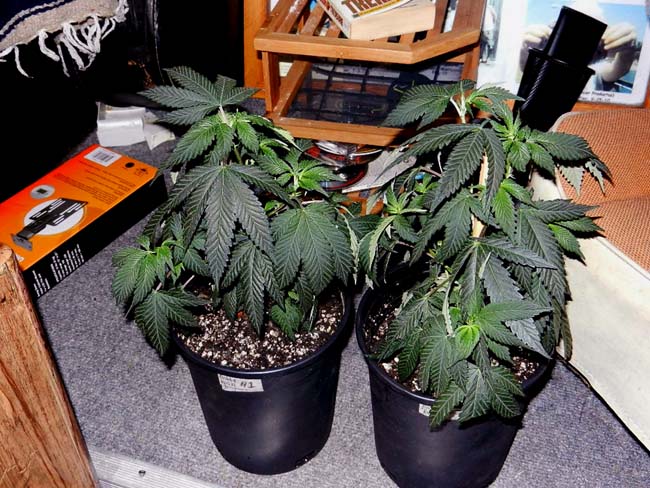
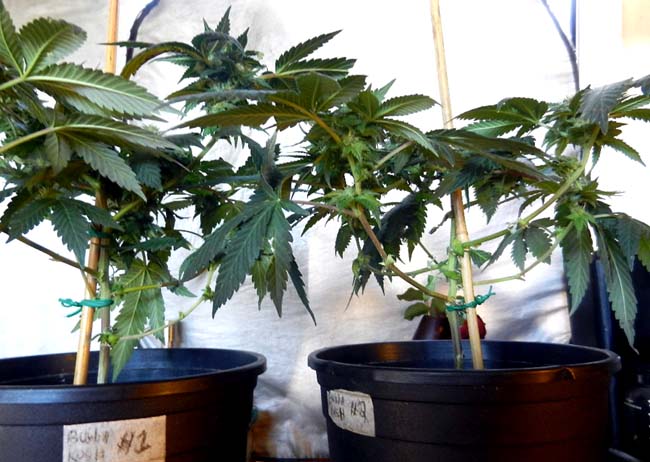
July 12th: Week 1 (Flowering)
Plants were transferred to the flowering chamber last night where they will
be for the next 60 days as their flowers mature. In this picture you can
see the Indica strain's characteristically broad leaves. and dark green coloration
Since they are pure Indicas (not hybrids) I don't expect they will double
in height like the Sativas do during the first 30 days (the 'stretch') of
flowering but I do expect they will grow from their present 9 inches to perhaps
14".
I am going to keep them in the smaller 1 gallon pots to see how well they
do ... there may come a time when I decide to flower 6 rather than 4 plants
and the smaller size will allow the maximum number of plants on the existing
shelf.
7-14:
Both
plants (foreground) were topped a second time to keep them squat and bushy.
Topping restrains
vertical growth and stimulates the growth of additional nodes which means
more flowers for the mature plant but I wonder if there might be a limit
... too many flowers for the available energy resulting in unequal and poorly
developed buds?
The lower 6 nodes on each plant were staked down with
wire ties today as they begin a period of LST (light stress training) to
open up the canopy.
Even though this shelf is four times the size of the vegetation chamber it
is still important to limit the size of the plants to insure that they all
get an equal amount of light.
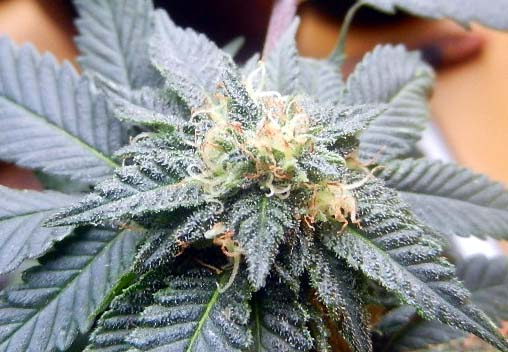
Note: I'm still having trouble capturing correct color renditions under the
HPS lamp in the flowering chamber - even with all the adjustments and corrections
available in Photo Shop the color balance is severely skewed towards the yellow
side of the spectrum.
July 19th: Week 2 (Flowering)